I offer you a delicious sponge cake with sour cream and fruits, to which I added agar-agar, so that it kept its shape, and the sour cream was thicker, as can be seen in the photo. I take as a basis, and you can take any other one at your discretion.
The recipe for sour cream with gelatin for sponge cake is very simple and there are no complex ingredients or long processes. And the assembly itself does not take much time.
Below I will show you how to dilute gelatin or agar for a cake so that it has the correct consistency, and I will also tell you exactly how much to add so that the dessert is not too dense, but also holds its shape well.
Fruit cake with gelatin and sour cream is very tasty, moderately sweet and soft. You can make it not only with tangerines, but also with other fruits, such as oranges, kiwi, bananas.
In my opinion, this is the simplest recipe for a delicious sponge cake, and if it weren’t for the hardening time, it would also be very quick to prepare. I advise you to make it, you will probably like it as much as my family.
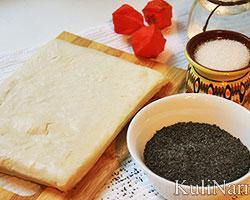
Ingredients:
Agar agar cake is easy to prepare and I start making it with this process. I pour the agar packet into a saucepan with warm water. 150 ml of water is needed. as stated in the instructions. I stir it and leave it for 5 minutes. I like agar rather than gelatin, since it needs to be added in much smaller quantities. For example, if I take only 8 grams of the first, then I need 50 grams of the second and working with it is also faster, because you don’t have to wait for it to swell. If you have gelatin, then pour it into water and leave it to swell. This takes about an hour.
 Meanwhile, I cut the biscuit into two unequal parts. The bottom cake should be thin, and I also cut the top part into small cubes; we need them to form the cake.
 Add sugar to the sour cream and beat this mixture with a mixer for about 3 minutes or until the sugar is completely dissolved.
 I make a cake from sponge cakes with fruits, namely tangerines, but you can add others to your taste, these could be kiwis, bananas, oranges. I peel the tangerines and cut each segment into two or three parts. Be sure to check them for seeds so that they don’t accidentally end up in the cake.
 After 5 minutes have passed, or for the second option an hour, I put the saucepan on medium heat and bring the mixture almost to a boil, but so as not to boil. Don't forget to stir. The mass will become thicker and more transparent. Now take it off the heat and let it cool a little. Remember that at 40 degrees the agar already hardens, so you need not to miss the moment, otherwise it will harden earlier than necessary. Since my cake filling is made from sponge cakes with fruit, I add chopped sponge cake and tangerines to the sour cream. I stir, pour in agar-agar and mix well again so that it is evenly distributed throughout the entire mass.
 I put cling film on the bottom and sides of the springform pan so that there are no holes through which something could leak. Then I put the bottom cake on the bottom. If desired, it can be soaked in a sweet syrup of water and sugar, but I did not do this, as it already turns out soft.
 And I put the rest of the mixture on top of it and distribute it evenly, trying to level the top of the cake. Now I put it in the refrigerator to harden, it took me 5 hours, but you can leave it overnight. In the morning, the tangerine cake made from gelatin and sour cream held its shape perfectly, while being soft and delicate in taste. By the way, in the end, the cake tastes a little like cottage cheese, although there is no cottage cheese in it.
 This is such an excellent sponge cake with sour cream, I advise you to try it too. It’s convenient that the sponge cake can be prepared in advance, and all other processes for assembling the cake are quick and simple. Bon appetit!
Everyone good afternoon and have a great mood! After all, it is the mood that often pushes us to certain feats. So I suddenly got hit at 11 pm and had an inexplicable desire to make a jelly cake with fruit. This idea was prompted by the remains of sour cream and a peach with several strawberries. I clearly imagined a bright dessert with a delicate texture and pieces of fruit.
There is not much time for cooking, because... I want to sleep, so I prepared the recipe according to an accelerated program - without baking. The preparation did not cause any difficulties; I mixed everything and left it to harden. By morning I was already ready.

I needed:
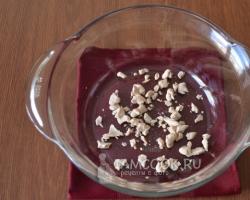
I diluted the gelatin in cold water and left it to swell for 20 minutes.

During this time, I whipped sour cream with sugar and vanilla sugar.

Melt the swollen gelatin over low heat. You should get a homogeneous liquid mass, but do not bring it to a boil.

Carefully poured it into the sour cream mixture, stirring thoroughly until dairy product not cooked.

I cut the strawberries and peach into small pieces, maybe like in my photo, or differently.

Added fruits and berries to sour cream mousse. I mixed everything carefully. Next, the mass should be poured into a suitable form, but I decided to leave everything in a glass bowl.

Like any jelly product, our cake must harden. Therefore, I safely leave it in the refrigerator overnight. But in general, 4 hours will be enough to cool down.


We decorate the unusual sour cream sweetness to taste - with green mint or pieces of fresh fruit.

Look how beautiful the cross-section of the cake is. Bright fruit pieces look very advantageous in white frozen jelly. At work the dessert was gone in 5 minutes. If you want a more satisfying cake, then my sour cream and jelly mixture can be poured before cooling for sponge cake into a spring form. Then it will turn out to be truly festive.
Another hearty and simple option is to mix poppy or sesame crackers into the sour cream mixture along with the fruit. And in winter, the berries can be replaced with pieces of multi-colored jelly. In general, there are a lot of dessert options - choose any one.
Bon appetit!
Typically, sour cream jelly cake is popular on hot summer days. It's not too sweet and the fresh fruit added to the recipe is refreshing. Moreover, sour cream cake Fruit jelly is stored exclusively in the refrigerator, and this is very important in hot weather. Don't let this particular set of fruits scare you. For this dessert, you can choose any fruits and berries that are welcome in your family. For example, it can be used in winter. And fresh strawberries and raspberries will go perfectly with sour cream jelly in the summer. Blackberries, cherries, peach, apricot, etc. will look just as beautiful in such a jelly cake.

1. The first thing you should do is choose a spacious bowl with a lid to give the cake its shape.
Now let's start preparing sour cream jelly for dessert. Carefully review the instructions for using the gelatin you choose for the recipe. There is gelatin, which dissolves immediately in hot water (at least 90 degrees), and there is gelatin, which must first be soaked in cold water, then dissolved in hot water. In the second case, you can pour cold water over the gelatin, leave for 30 - 50 minutes, then heat it in a water bath like chocolate, stirring constantly until completely dissolved.
Advice:
it is very important that the sour cream jelly turns out homogeneous and tender - all products for its preparation must be room temperature.
2. Beat sour cream with sugar and vanilla sugar with a mixer.
Advice:
If you want the sour cream to be whipped as best as possible and the cake to be airy, choose a product with less fat content for cooking. 
3. Pour the prepared and completely dissolved gelatin into the sour cream slowly and mix. You can continue to use the blender. But do not forget about the temperature ratio; sour cream and gelatin must be at the same temperature during mixing. This means that you will have to cool the gelatin to room temperature. By the way, sour cream jelly is also suitable for cooking with juice. 
4. Lay out the peeled and sliced fruits in layers in a checkerboard pattern. 
5. We have already described how to cook one that does not fall. It's worth trying to cook it. You will love this recipe the first time you try it. To prevent the sponge cake from creating gaps in the jelly cake made from sour cream and fruit, it must be broken into pieces and dipped in the prepared sour cream jelly on all sides. Place a sponge cake on top of the fruit and pour sour cream jelly over it. So we continue alternating layers of fruit, biscuit, jelly. 
Advice:
As a rule, kiwi is very juicy, but incredibly tasty in a cake. To prevent it from giving excess juice, place it on the biscuit all the time. This way it will release the juice, but at the same time soften the sponge cake itself. 
The finished cake made from sour cream jelly, fruit and sponge cake must be placed in the refrigerator until completely hardened. Then invert the cake before serving on a beautiful platter. Remember, if the jelly is good and the cake does not want to come out of the mold, dip the bowl in hot water for 30 seconds, then try again.
Sponge cake with cakes and a jelly layer of tropical fruits, berries and fruits, soaked in sour cream and yoghurt delicate cream will win the hearts of even picky sweet tooths and avid gourmets. Such desserts turn out to be very appetizing, you can’t tear yourself away from them. You will like them delicate taste, sweet cream and light sourness from fruit. Your guests, relatives, and, of course, children will be grateful to you for such a dessert, and certainly no one will leave without a refill.
Of course, you will have to tinker with this cake. But the result will be appropriate. A very unusual design of a cake consisting of sponge rolls with creamy jelly and jam, will not leave anyone indifferent.
Ingredients:
For the biscuit:
For the soufflé:
Cooking method:
Pour gelatin with boiled cold water at the rate of 100 milliliters of liquid per 10 grams of powder, leave to swell for an hour. Now you have time to bake the sponge cakes. To do this, beat the eggs with sugar, including vanilla. When the egg mass becomes fluffy and airy, stop beating and use a spoon to add the flour sifted with baking powder.
Prepare a small baking tray, you need it to be square or rectangular, approximately 20x30 centimeters. Cover its bottom with parchment and grease the sides with oil. Pour out part of the dough so that its height is half a centimeter, level it over the entire surface with a spoon. By this time, the oven should already be preheated to a temperature of 180 degrees. Place the baking sheet there for 15 minutes, since the layer of dough is thin, the cake will bake quickly. Pour the remaining dough into a round pan lined with parchment and place it there to bake the bottom crust. After a quarter of an hour, remove both pans from the oven. Roll the rectangular cake into a roll; you can do this without removing the paper.
Next you need to prepare a creamy soufflé. Bring the water to a boil, add the swollen gelatin to it, and, stirring constantly, make sure that the resulting liquid does not boil. When the mixture reaches homogeneity, remove from heat. Set aside and let it cool. Whip the cream at high speed; when it becomes strong, add sugar, yogurt and gelatin mixture.
Next, unroll the sponge cake, brush it with jam and roll it into a tube. Then cut into pieces about 1 centimeter wide. Remove the paper from the round sponge cake and return it to the pan. Place the gelatin soufflé made from cream on it and smooth it out. Place the mold in the refrigerator for a couple of hours. Then place the rolls on top in random order. Next, prepare the jelly according to the recipe indicated on the package. Then, once cooled, pour it onto the rolls and refrigerate for 6 hours. Sprinkle the finished jelly cake with coconut shavings of different colors.

Let the recipe for this dessert always be at your fingertips. Delicious, light cake based on whipped cream and fruit jelly. It can be prepared for any holiday, celebration or party, as well as just for tea every day.
Ingredients:
Cooking method:
Pour 100 milliliters of cold water over the gelatin and set aside to swell for about an hour. Beat the eggs with sugar into a fluffy foam, add vanillin. Using a spoon, add flour, sifted twice, add baking powder - after stirring, you will get a classic biscuit dough. Preheat the oven by setting the temperature to 180 degrees. Line the pan with parchment and grease it with butter. Place the dough into it and bake. This will take from half an hour to 40 minutes. Check readiness with a wooden torch.
To prepare the jelly buttercream you need to start with gelatin. Heat it, already swollen, over the fire, stir the liquid until all the lumps have completely melted. Remember that you should never boil gelatin, just bring it almost to this state and turn off the heat. Whip the cream to strong peaks, add sugar (100 grams), yogurt and mix, then, without stopping working with a spoon, pour in the gelatin mixture. Add cocoa powder here to make the cream soft and creamy. chocolate taste.
By this time the biscuit will be ready in the oven - take it out and cool. Place back into the pan in which it was baked. Pour the chocolate cream on top in an even layer and leave the cake in the refrigerator until it hardens. The next one will be the “floor” of jelly. It is advisable that it be strawberry, this will preserve the excellent combination of berries and chocolate. But really, you can take anything. You have time to make it while the future jelly cake is cooling. The recipe for its preparation is indicated on the package. When the jelly is no longer hot, pour it carefully onto the soufflé, smooth it out and put it back in the refrigerator. By morning you can remove the mold, as the cake will already be frozen. Enjoy
Agree that a cold cake with a jelly layer, curd mass and fruits - a great way to enjoy a wonderful dessert during the hot summer. This cake turns out light and airy, despite the presence of cottage cheese in it. With this dessert you will attract your children to tea drinking, because it is not only tasty, but also very healthy.
Ingredients:
For the biscuit:
For the curd cream:
For fruit jelly:
Cooking method:
The first step is to bake a chocolate sponge cake. To do this, mash the butter and granulated sugar in a bowl. It is better that it is warm or at least at room temperature, so it will disperse more easily. Note that instead of butter you can use margarine. Add 3 to the resulting mixture chicken eggs. Next in the recipe comes sour cream, after which the dough is mixed again, and finally flour. It needs to be put in an average of 1-1.5 cups, look at the consistency. Don't forget to add baking powder. The dough should be more or less homogeneous, without lumps.
According to this recipe, the sponge cake is not dry, as usual, but soaked and moist. Now add cocoa to the dough so that it has a chocolate taste and aroma. Add the peeled nuts there and mix everything. Cover the pan with parchment, transfer the dough into it and bake at 180 degrees for about half an hour.
While the cake crust is ready, you can prepare the filling for the second layer. To do this, rub the cottage cheese through a sieve so that it turns out fine and airy, add powdered sugar and a few spoons of sour cream and mash again with a spoon. If you have an immersion blender, then the process of preparing this cream will be much faster: put the indicated ingredients in one bowl and simply grind them. The consistency of this cream will be quite thick.
By this time the cake will be baked, remove it from the oven and cool. Place on the cooled biscuit curd cream and put the cake in the refrigerator. At this time, prepare the third jelly layer for your dessert. Heat 370 milliliters of water and pour the gelatin from the bag into it, stirring with the other hand until all the grains are completely dissolved. After a few minutes the jelly will be ready, remove from heat. Once cool, carefully pour it onto the pre-cooled cream sponge. Since this cake will be with fruit, don't forget to cut the apple and strawberries. Dip pieces of fruit and berries into the jelly layer, arrange them nicely and refrigerate them overnight. In the morning you can enjoy a wonderful dessert.

This recipe is somewhat reminiscent of Broken Glass, but there are minor differences. This cake is prepared only with biscuit pieces. And “Broken Glass” can also be served with cookies, crackers, gingerbread and other flour products. Otherwise the cakes are similar, take note of this recipe.
Ingredients:
For the biscuit:
For the filling:
Cooking method:
Open the bags of multi-colored jelly, make each according to the recipe indicated on the package, pour into plates and put in the refrigerator so that it hardens thoroughly. Meanwhile, prepare the sponge cake: beat the eggs with a mixer, add sugar and continue beating. The eggs should increase significantly in size and turn white. When the granulated sugar has completely dissolved, stop the mixer and add the sifted flour with a spoon and add the baking powder.
Stir the dough carefully, moving in a circle, thoroughly kneading the lumps. Cover the pan with parchment or simply grease it with butter. Place the dough in it and bake in hot oven(180 degrees) at medium level for about 25 minutes. After the time has passed, take out the pan with the biscuit and check its readiness with a wooden stick. When the cake has cooled, remove it from the pan and cut it into nice, even cubes.
Pour gelatin into half a glass of warm water, stir and heat over heat. Bring to a boil, do not forget to stir so that the gelatin does not clump, but dissolves completely. Separately, beat the sour cream with sugar, and when the gelatin mixture has cooled, add it here. Again, pour in with one hand and stir with the other. This must be done because sour cream has more low temperature than warm gelatin and, as a result, the latter can harden in pieces.
Remove the already frozen multi-colored jelly from the bowls. To do this, just lower the bottom of the dish into warm water for a few seconds, and then quickly turn it over. Cut the jelly into even pieces. Cover a deep bowl with a round bottom with cling film, pour sour cream into it, throw in pieces of biscuits and colorful jelly. To completely harden, place the cake in the refrigerator. When removing it from the bowl, first turn it over onto a plate, and then carefully remove the film. You can try the cake, bon appetit!
All your guests will be delighted when they see this wonderful cake. The gelled fruits in the top layer look very attractive. Inside you will find a delicate airy sponge cake layered with white sour cream - a real delight.
Ingredients:
For the biscuit:
For impregnation:
For decoration:
Cooking method:
The sponge cake for this cake is made according to classic recipe, which all housewives know very well. But if you started cooking it for the first time, we will remind you. First, only the eggs are beaten, and when the mixture increases in volume and turns white, you need to add a glass of sugar. Whisk until the granulated sugar is completely dissolved. Then add the flour, after sifting it through a fine sieve. Don't forget vanilla.
This cake is baked in the oven at 180 degrees for about 35 minutes. When the baking process is complete, remove the biscuit pan, wait until it cools down, and then cut it into two parts. To prepare sour cream, mix sour cream (yogurt) with sugar and vanilla in the indicated proportions. Spread one cake layer with cream. Then peel the bananas, cut the pulp into rings and place in the next layer. The fruit is then followed again by sour cream. Cover the cake with the second sponge cake, coat it and decorate it again with fruit, you can add candied fruits.
Next in this cake there will be another layer - fruits in jelly. First, do the latter. Heat fruit juice (or syrup diluted with water) over a fire and add one and a half tablespoons of gelatin into it, stir until it completely melts. If there are small lumps left and they do not disperse, this mixture needs to be strained. Let it cool. Gradually pour the top of the dessert, first with a small layer to harden the fruit, and into the refrigerator, after a while pour out the rest of the portion and refrigerate the cake until it hardens completely.
Remember that such a dessert must be prepared in the same springform pan in which you baked the sponge cake. Then the jelly and cream will not spread, and it will be easier to take out the cake. For housewives who don’t have time, the recipe can be simplified a little. Firstly, you can buy ready-made biscuits in the store, and secondly, you can make jelly from bags. You can try the cake in the morning, enjoy your tea!

This dessert, unlike others of different flavors and colors, will be in one style and dedicated to just one fruit - kiwi. The prepared jelly will also have a correspondingly green color and the taste of an exotic fruit. If you like this style, start creating a confectionery masterpiece.
Ingredients:
For the test:
For the jelly cream:
Cooking method:
Remember: to create biscuits, use only fresh eggs, then the result of your baking will be excellent. In addition, it is advisable to always cool eggs before beating. So, let's get started. Divide all the eggs into whites and yolks. Beat the egg whites at high speed with a mixer, adding a pinch of salt. When they get stronger, you can add sugar little by little. When the sugar is completely dissolved, add the yolks one at a time.
At a reduced mixer speed, you can add the sifted flour and add baking powder. Line the pan with baking paper. The oven must be preheated to a temperature of at least 180 degrees. Place the dough in the pan and leave to bake. During the process, it is strictly forbidden to open the door and look inside the oven - in this case, the white baked goods may fall off. Upon completion, use a toothpick to check the readiness of the future dessert in the center of the cake. The stick should come out dry and clean - this will indicate that the biscuit is sufficiently baked and can be removed. Divide the cooled cake into 2 halves.
In the meantime, you can prepare sour cream: to do this, simply whisk sour cream and sugar in the proportions indicated in the recipe. Then add pre-dissolved gelatin to this cream and mix well. Now you can start assembling the cake; this will happen in several stages. So, place the biscuit cake on the very bottom of the springform pan, spread sour cream on top of it in an even layer and put it in the refrigerator to harden.
Peel the kiwi fruits and cut into rings. After a while, when the sour cream has set, place the fruit on it. They need to be filled with half of the jelly made with kiwi flavor (the one you bought in a bag). The recipe for its correct preparation is indicated on the package. Next, the cake needs to be refrigerated again. This layer will take longer to harden, be patient. When the jelly is sufficiently strong, place the sponge cake again and repeat the procedure again. Remember, each layer must harden separately. The top “floor” is made of kiwi in jelly. At the end of cooking, leave the cake in the refrigerator overnight; it needs at least 6 hours to harden.
We have presented for your consideration several recipes for desserts based on sponge cakes with jelly. The cakes are all different, both in preparation and in assembly. You can add a variety of fillings and creams, different kinds of fruits and berries to them - it all depends on your taste preferences and, of course, your imagination! You can make them from pieces of rolls, add jelly cubes inside, fill them or make a top layer with fruit - in any case, the cake will be your new culinary feat. Undoubtedly, it will take up a lot of your time in the kitchen, because technology requires it. But in the end you will get a light, non-greasy healthy dessert for the whole family.
Ingredients
For the biscuit:
For cream:
Melting dough with a minimum set of ingredients and excellent soakability is always an ideal basis for complex confectionery. The recipe for a delicious sponge cake with sour cream is an example of one of the most simple options lung use biscuit dough.
But even such basic recipes as sponge cake with sour cream have their secrets, without knowing which you can be disappointed with the result. For example, the choice of fruits. Summer nuances of taste are dictated by domestic fruits and berries.
With our homemade sponge cake with sour cream today, the flavor nuances of the local harvest dictate: strawberries, cherries, raspberries, blackberries, mulberries. Apples, pears and other fruits with a dense structure are not suitable, since their use involves baking.
The autumn and winter choice will mainly fall on foreign fruits presented in the list of ingredients above. A sponge cake with sour cream and bananas will undoubtedly be appreciated by our youngest gourmets. And the subtle sourness of kiwi and the juicy sweetness of pineapple with syrup will appeal to sophisticated lovers.
The second secret is small additions that can give the product originality:
Honey sponge cake with sour cream is an exquisite delicacy obtained by adding 3-4 tbsp to the list of ingredients for the cake. spoons of fragrant flower honey;
Chocolate sponge cake with sour cream - add 2 teaspoons of cocoa powder to the sponge cake recipe, and also add 3 tbsp. spoons chocolate paste into cream;

Sponge cake with sour cream and condensed milk - only 4 tbsp. spoons of condensed milk, instead of 1/3 of the amount of sugar in the cream, and children will appreciate the new product!
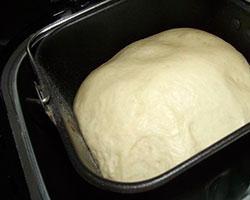
1. Preparing the biscuit.

2. Prepare jelly for sponge cake with sour cream.

Pour the granules from the bag into a small bowl and pour boiling water over them, reducing the amount of liquid relative to that indicated on the package by 1.5 times. This will make the jelly structure denser and the chosen color richer. For the rest, follow the instructions.
3. Let’s start making the cream for the sponge cake with sour cream. Place sour cream in a dry mixer bowl and beat it at high speed for 7 minutes, adding granulated sugar and vanillin little by little.

4. Assembling the cake.

Our quick sponge cake with sour cream is ready. As you can see, the process of baking and forming our miracle, not counting the cooling time finished product, took 40 minutes at most.
And now - a few basic rules for preparing a delicious sponge cake with sour cream:

To knead the biscuit dough, take a dry bowl;
To make the mass fluffy, the whites should be beaten separately from the egg yolks and then mixed without sudden movements;
To make the biscuit porous, granulated sugar can be replaced with powder;
The cake must be baked in a preheated oven;
Do not open the oven door during baking, otherwise the biscuit will sag;
It is better to choose fatty sour cream for cream, and beat it with a mixer or blender;
To prevent the cream from turning out watery, you can first hold the sour cream under a press to eliminate excess liquid;
The cream will be softer and tastier with the addition of powdered sugar and banana pulp;
For flavor, you can add vanillin or essence to the biscuit.