There is a lot of information on the Internet about how to knead salt dough, how to sculpt it, but at the same time, few masters share various small secrets for working with this interesting material. Today you will learn 11 secrets of salt dough crafts for beginners that will help you create more beautiful works and make it easier to work with.
Channel: Drawing with children
Recipe for salt dough for crafts:
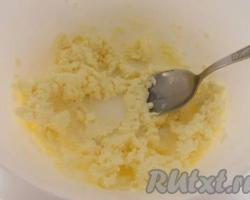
Pour flour, salt into a bowl, pour out water and knead the dough. If you suddenly find that there is too much water, add a little flour. The dough should look like plasticine.
1. The first secret is the secret of the dough, from which figures come out that do not crack when dried.
A very common problem with salt dough products is that they begin to crack when dry. What can be done to prevent this from happening? To prevent the dough from drying out and cracking, you need to add a little vegetable oil to it. For the above proportions, ½ teaspoon is enough.
2. In order for the finished salt dough figurine to be more durable, unbreakable and unbreakable, you need to add 2 tablespoons of wallpaper glue or PVA glue when kneading into the salt dough at the above proportions. Then, after drying, the figurine will become more durable and it will be impossible to break it.
3. If, when kneading the dough, you feel that it is too dry and when breaking it has dry edges, wet your finger in water and lightly grease the dough with a damp finger at the break point. After this, knead the dough well. If necessary, repeat.
4. The dough must be kneaded to such an extent that it is not rough to the touch. You need to knead the salt dough for a very long time. It is better to knead in small portions so that the piece fits in your hand. Once you feel the dough has become smooth, place it in cellophane and refrigerate.
5. If you first sculpt from ordinary dough and paint it with gouache after drying, then the painted work must be varnished. Surface varnishing protects the finished work from moisture and gives additional richness to the colors.
Since children cannot work with varnish, it is better for children to pre-color the dough and use food coloring for coloring. To color the dough, you need to flatten a piece, sprinkle a little dry food coloring in the middle, dip your finger in water and wet the coloring. Gather the flattened dough into a lump with dye inside and begin to knead it and knead it. The dough with dye kneads faster, it is softer and more elastic than usual.
6. If you paint the finished product with gouache, then in order to prevent it from staining your hands in the future, you need to add a little PVA glue to the paint.
7. If you start sculpting from dough and, after rolling out the layer, you see cracks in it, you must wet your finger with water and cover these cracks. The surface of the future product must be perfectly flat. The appearance of cracks usually means that the dough is poorly kneaded.
If a crack appears on the finished figure, then drop water onto the crack so that it flows inside and carefully cover it until smooth. Water will help seal the crack.
8. Roll out the dough to a thickness of at least 3 mm.
9. If you are making flat figures, then when the work is ready, turn on the oven to the lowest heat possible and, without closing the oven, dry until completely dry. Otherwise, they will lead, they will swell and lose their shape. Very often you can hear advice that you can dry your work on a radiator. However, the dough takes a very long time to dry on a radiator. It may dry out on top, but the inside will be damp and may break or become deformed in the future.
10. After cutting out a flat figure, the edges are uneven and rough. Dip your finger in water and smooth the edges until smooth. Then the figurine itself will be worthy of being given as a gift and not to be embarrassed.
11. When cutting out a figure from the dough, you cannot “pull” the knife: the dough can start to be pulled behind it. You need to cut using pressing movements, piercing the dough around the perimeter of the figure.
In the video master class you can also see how to make New Year's craft from salt dough - an angel figurine to decorate gift packaging.

Modeling from salt dough is attractive for a preschooler, the material is pleasant to hold in hands, it is not dangerous, it is cheap, it perfectly develops fine motor skills, the child immediately sees the result of his work, a wide selection of techniques. Modeling from salt dough develops a child's creative abilities, allowing him to fantasize and come up with new images.
Take two cups of flour, one cup of fine salt, stir well, add 2/3 cup of water, 0.5 cup of PVA glue, a dessert spoon of vegetable oil, knead until elastic (like dumpling dough). Store in plastic wrap in the refrigerator (or in plastic containers with a lid).
1st method: To color, first evenly divide the ingredients of the future dough into bowls, add environmentally friendly dye (gouache, food coloring), stir with flour, and then add water.
2nd method: paint finished figures with gouache after they are completely dry.
1st method: dry the salt dough at normal temperature or on a radiator.
2nd method: dry in the oven at a temperature of 60-80 degrees for an hour if the craft is voluminous.
Advice: It is recommended to sculpt the craft immediately on a stand, on which the child’s work will then dry; if drying is planned in the oven, then you can use small iron trays or cardboard wrapped in food foil as a stand.
1. Plastic containers with an easy-to-open lid, since the surface of the dough dries out in the air and becomes cracked. During operation, the required amount of dough of a certain color is taken from the container, the rest is stored under a closed lid.
2. A bowl containing a cloth soaked in vegetable oil, which can be used to lubricate your hands and wipe tools so that the dough does not stick to them. If vegetable oil is added to the dough, then, as a rule, you can do without an “oil” napkin. The second way to prevent the dough from sticking is to use flour on your hands, a rolling pin, or a board.
3. Board, small rolling pins (making plates), a body for a marker, felt-tip pen (rolling tape).
4. Stacks (available in a set with plasticine), you can use them to cut out shapes and apply relief to crafts.
5. Fabric with a pronounced texture - to give relief to the craft (guipure, crinkled fabrics).
6. A set of beautiful beads, buttons, bugles, braid for imprinting into the dough, as well as making voluminous decorations (do not dry the craft in the oven with decorations made of artificial materials for safety reasons).
7. Brush, water for gluing individual parts, as well as repairing broken crafts.
8. Material for making the frame: jars, boxes, foil that can be crumpled into a certain shape, coils of wire, etc.
|
Lamb made from salt dough. Master class with step by step photos.Author: Natalya Valerievna Sorokina, additional education teacher, MBOUDO "DDT" Navashino, Nizhny Novgorod region Description: the master class is intended for children of preschool and primary school age, as well as for parents and teachers who are interested in creativity. Purpose: can be given as a gift, to decorate the interior of a room. Goal: making a figurine of a sheep from salt dough Objectives: - teach how to make a three-dimensional figurine of a belly... |
|
Modeling from salt dough with children of primary preschool age. Master class with step-by-step photos Author: Komissarova Natalya Gennadievna, teacher at MBDOU No. 196, Izhevsk. Description: this master class is intended for children of primary preschool age, educators, additional education teachers, parents and other creative people. Purpose: this craft can be used to decorate a New Year tree and as a gift. Purpose: making a gift from salt dough “Mitten... |
|
Candlestick made of salt dough for children 3-4 years old. Step by step instructions with photoAuthor: Natalya Gennadievna Komissarova, teacher at MBDOU No. 196, Izhevsk. Description: this master class is intended for children of primary preschool age, educators, additional education teachers, parents and other creative people. Purpose: The candlestick can be used to decorate the interior and as a gift. Goal: making a souvenir from salt dough. Tasks: - consolidate skills... |
|
Salt dough pork. Step-by-step instructions with photos. Author: Natalya Valerievna Sorokina, additional education teacher, MBOUDO "DDT" Navashino, Nizhny Novgorod region Description: the master class is intended for children of senior preschool and primary school age, and can also be used in individual work with children with disabilities, for parents and teachers who are interested in creativity. Purpose: can be given as a gift in the form of a souvenir, used... |
|
Pig" - a symbol of 2019 with your own hands. Master class with step-by-step photosAuthor: Svetlana Petrovna Semenova, teacher of the Children's Preschool Educational Institution "Ladushki" Purpose of the work: the craft can be used as a gift, souvenir for New Year. Description: the master class is intended for children of senior preschool and school age, for teachers of preschool institutions and additional education, for lovers of creativity. Do you hear the door creaking? The pig is standing at the door! Friendly everyone... |
|
Pig is a symbol of 2019 made from salt dough. Step-by-step master class with photoMK is intended for children with disabilities of III-IV types, but can be useful to all creative and gifted children and teachers. You can make a “pig” with a magnet and give it to your family as a gift, or you can thread a string and hang it on a Christmas tree. Goal: - development of creative imagination; - development of fine motor skills of the hands; - development of memory, attention and thinking; - development of the ability to work according to a template, from a photo. May the Pig bring you good luck, And provide... |
|
Do-it-yourself aquarium made from salt dough for children 6-7 years old, step by step with photos. This material is intended for children of senior preschool age, teachers, parents and creative people. Purpose: subject development environment kindergarten, creating a board game. Goal: Development of graphomotor skills. Objectives: - develop fine motor skills, creative imagination, fantasy; - arouse interest in working with salt dough; - developing skills in working with salt dough; - educate ac... |
|
Do-it-yourself piggy made from salt dough. The master class is designed for children 6-10 years old, kindergarten teachers, primary school teachers, parents, and creative people. Purpose: 2019 is the year of the earthen pig, this souvenir can be used all year round as a souvenir for acquaintances, friends, relatives. Purpose of the master class: To teach children how to make souvenirs from salt dough. Goal: To cultivate accuracy in work, attentiveness and love for arts and crafts, to develop... |
|
Flower on a stick made of salt dough. Master class with step-by-step photos for beginners Author: Komissarova Natalya Gennadievna, teacher at MBDOU No. 196, Izhevsk. Description: this master class is intended for children of primary preschool age, educators, additional education teachers, parents and other creative people. Purpose: A flower on a stick can be used to decorate the interior and as a gift. Goal: making a souvenir from salt dough. Tasks: - complete... |
|
Rowan from salt dough. Step-by-step master class for children 3-4 years old. Author: Komissarova Natalya Gennadievna, teacher at MBDOU No. 196, Izhevsk. Description: this master class is intended for children of primary preschool age, educators, additional education teachers, parents and other creative people. Goal: making a souvenir from salt dough. Objectives: - expand children’s understanding of the rowan berry. - strengthening the ability to roll out dough in a circular motion, tuck... |
|
DIY Easter souvenir made from salt dough. A step-by-step master class with photo MK will be useful for special education teachers, preschool teachers and parents. Goal: acquaintance with the Orthodox holiday of Easter and the traditions of the Russian people. Objectives: - development of fantasy and creative imagination; - development of fine motor skills and sensory perception; Progress of the lesson. (Teacher's story with slide show). The Holy Resurrection of Christ is the most important Christian holiday. On this day, all Orthodox... |
|
Duckling made from salt dough with step-by-step photos Author: Chizh Lyudmila Adverikovna, teacher at GBOU School No. 1373 ODO 4 in Moscow. Description: the master class is intended for children of senior preschool age, additional education teachers, and educators. Goal: making a duckling from salt dough. Objectives: 1. introduce children to salt dough as a material for work; 2. cultivate children's creativity; 3. develop fine motor skills of the hands; 4. formation of creative activity, artistic... |
|
Didactic game "Beads as a gift." Master class with step-by-step photos. Author: Elena Vladimirovna Maksimova, teacher, MBDOU “Kindergarten No. 321” Samara. Description: I bring to your attention a master class on making a didactic game. This material is designed for preschool children, teachers, and parents. The beads are made from salt dough. Goal: development of general and fine motor skills of the hands. Objectives: - developing the ability to combine beads by color; - development of attention, perseverance... |
|
Winter application from salt dough step by step with photos for children of the senior preparatory group Author: Svetlana Nikolaevna Babinova, teacher at MBDOU "Kindergarten No. 183" Description of the material: The material is intended for children of senior, preparatory preschool age, educators, preschool teachers, students. Purpose: can serve as an exhibition decoration, as well as a gift to family and friends. Goal: making crafts from salt dough. Necessary tools and materials... |
|
Master class on making an insect from salt dough "Caterpillar" Author: Natalya Valerievna Sorokina, additional education teacher, MBOUDO "DDT" Navashino, Nizhny Novgorod region Description: the master class is intended for children of preschool and primary school age, as well as for parents and teachers who are passionate about creativity. Purpose: You can play with this craft, create your own collection of insects, or give it as a gift. Goal: making a caterpillar from salt dough Objectives: - teach... |
An article for those who like to be creative with their children. It contains recipes for salted play dough and many ideas for crafts.
Modeling is a fun and useful activity at the same time. By making figurines, paintings, and compositions from plastic material, the child develops imagination, logical thinking, fine motor skills, and learns perseverance.
Of course, mom can just buy plasticine or some branded modeling compound for the baby. But how high quality and environmentally friendly are these materials? As an alternative, you can use salt dough made with your own hands from inexpensive natural products.
Environmental friendliness is not the only advantage of salt dough over plasticine or play-doh.
IMPORTANT: Even in ancient times, people mastered modeling from dough with salt. A whole art arose, which was called testoplasty. Women and children made very elegant crafts, painted them by hand and used them as decorations for their homes. Figurines symbolizing various benefits were considered expensive gifts, given only to close people. Our ancestors didn’t bother with the salt dough recipe, making the material only from water, flour and salt
Today, salt dough modeling, which has suddenly returned to popularity, is called bioceramics. The recipes for the dough itself are being improved. Unfortunately, some of them involve the use of wallpaper paste, synthetic paints, etc. The concept of absolute naturalness is lost.

Salt play dough has three main components. This:
Additionally widely used:
Glue or starch makes ready-made dried dough figures more durable, but it is not advisable to add them to material intended for children under 5 years of age. But dough with butter can be greasy and stain your clothes.
IMPORTANT: You can color both the dough itself while it is being prepared and the finished figurine, then creativity will be doubly more interesting and useful

RECIPE No. 1. Simple dough
You need: wheat flour - 1 cup, extra salt - 1 cup, cold water - 0.5 cups
First of all, the dry ingredients, flour and salt will be combined. If the dough is colored with food coloring or paint, dissolve it in water. Gradually adding colored water to flour and salt, knead a fairly stiff dough, but such that it does not stick to your hands and does not crumble into crumbs.
IMPORTANT: To check whether the mass is suitable for modeling, roll out a smooth ball and press a hole in the middle of it with your finger. The dough should neither spread nor immediately return to shape. The edges of the recess should remain smooth
RECIPE No. 2. Dough with starch
You need: wheat flour - 0.5 cups, starch - 0.5 cups, extra salt - 1 cup, water - 0.5 cups.
Just as in the first case, first mix flour, salt and starch. Next, clean or colored cold water is gradually added. Modeling mass that contains starch becomes more elastic.
In addition to the saltiest modeling dough, you need to prepare:
IMPORTANT: The flour and salt dough can be used several times in a row. To prevent it from drying out, place the material in a plastic bag or wrap it in cling film, then close it in an airtight container and put it in the refrigerator.
If the dough crafts are small, they will dry out on their own. To prevent cracks from appearing on their surface, they are removed from direct sunlight.

You can also dry the dough figures in the oven at a minimum temperature and always keep the door ajar. Dry the dough in the oven for 3 – 6 hours, depending on the size of the craft. It goes into the oven three times for 1 - 2 hours, with a short break between each time.
You can offer salt dough to your baby for the first time at the age of 1 year. This is not chemical plasticine or play-doh; mom doesn’t have to worry if the baby tastes the material or swallows it. For such small “homemade products”, the dough is prepared without synthetic dyes.

IMPORTANT: Play dough is very salty. As a rule, it is enough for a child to lick it to understand that it is not edible. But if the baby still ate a piece, you just need to give him plenty of drink, and if the mother is still worried, a bag of Smecta
Full-fledged developmental modeling classes are possible with children from 2 years old. From rolling out circles and balls from salt dough, they will smoothly move into real creativity, in which kids will be able to make flowers, animals, favorite fairy-tale and cartoon characters, etc.

The finished result of dough modeling is as important for kids as the process itself. The finished craft evokes strong positive emotions in them.
There is no need to think that salt dough is a “handicraft” material exclusively for home use. Kindergarten teachers have long taken note of recipes for plastic materials and are happy to replace plasticine with them in developmental classes with students.

So, in nurseries they often make casts of baby hands, circles, mushrooms, “sausages”, snails, etc. In older groups, children are already working on themed crafts, for example, for the holidays.
When making dough with kids, you don’t need to come up with ideas for crafts: usually, they are born by themselves the moment your fingers touch the plastic material. Children love to sculpt:

Adults, mastering testoplasty, can get ideas on the Internet; there are many step-by-step master classes.
IMPORTANT: Good guides for both children and beginning adults are the books “Salt Dough Step by Step” by V. Khomenko and “Miracles from Salt Dough” by A. Firsova
Crafts made from salt dough can be very beautiful. Children's crafts have their own touching charm. Adults are like pottery.
To get inspired for creativity, you can view a selection of thematic photos with crafts made from salt dough.
Such works of bioceramic art can be hung on the wall or placed in a prominent place. Photo frames made from salt dough are also very beautiful.


For the New Year, you can make not only Christmas tree decorations from dough, but also gifts - souvenirs for friends in the form of the symbol of the year. In 2016 this is a funny monkey.


The heart is a symbol of Valentine's Day. Made with your own hands from flour, salt, water and, of course, love, it will turn into a very valuable gift.
A cute angel made from salt dough also looks very cute.


Any mother will be touched by a craft given to her by her beloved child for the holiday of March 8th. Most often these are flowers, bouquets, floral arrangements. Roses made from dough will never wither.


Magnificent basket with flowers.


Easter crafts made from salt dough will add a special flavor to the bright holiday
Together with your baby, you can fashion a whole zoo out of salt dough!


Modeling from salt dough is a fascinating activity that can bring a lot of pleasure to both little fidgets and adult uncles and aunts. Salt dough is an excellent pliable material from which you can make a lot of interesting crafts, including entire paintings that radiate the warmth of the master’s hands and home comfort.
To create a real masterpiece, you will have to try hard, but absolutely anyone can master testoplasty, especially since this technique does not require any unique abilities or expensive materials. If you set a goal, you can find everything you need without leaving home, if you wish. For children, making crafts from salt dough will be not only an interesting, but also a very useful activity, since fine motor skills of the hands are directly related to the development of speech, thinking, attention, imagination, visual and motor memory, and any joint creativity brings them together.

Almost every master uses his own unique dough recipe, so today we will offer several recipes at once. All recipes are good, but each is good in its own way. One is more suitable for small products, the other for large ones, and the third is suitable for working with children. By experimenting with different components, you can decide on the optimal recipe.
Salt dough recipes
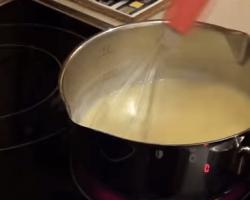
to contentsPour a glass of salt and a glass of flour into a large bowl. Mix with a spoon. Pour in half a glass of water and a tablespoon of vegetable oil. Mix with a spoon and knead with your hands until smooth, just like regular dough. To make the mass more plastic, replace the water with starch jelly. To prepare jelly, dissolve a tablespoon of starch in 1/2 cup cold water. Bring another glass of water to a boil in a small saucepan. While stirring, pour the starch solution into the boiling water. When the contents of the saucepan become transparent and thicken, turn off the heat, let the jelly cool, and then instead of water, add it to the mixture of flour and salt.
If the dough turns out too soft, mix a tablespoon of salt with a tablespoon of flour at the bottom of the bowl. Press the ball of dough into the mixture and knead. If necessary, repeat the procedure.

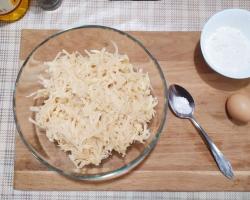
You may need a little more water, the amount depends on the type of flour. The density of the modeling dough should resemble softened plasticine. To prepare the dough, pour salt into hot water, wait until the salt is completely dissolved and the water cools. Add flour (the second kind is also quite suitable) and knead the dough thoroughly.
to contents
To finished product there were no crystals, and the surface was smooth; the salt for preparing the dough should be finely ground. If you only have coarse salt on hand, before kneading the dough you should grind it in a coffee grinder or dilute it with the amount of water specified in the recipe. It is better to choose inexpensive varieties of flour without emulsifiers, baking powder and other additives.
Ready dough Wrap it in film to prevent it from drying out, and put it in the refrigerator for several hours. This will make the dough more elastic and easier to work with during modeling, and it will not break on the sides.
When working with children, choose recipes that do not contain glue.

Uncolored dough will have a light beige color. To give the product a warm bready shade, take half of the wheat and rye flour from the amount specified in the recipe. Use one rye flour This is undesirable because the dough will be hard, inelastic and will crumble.
Using watercolor or gouache, you can paint either ready-made figures or color the dough at the kneading stage. Gouache paints, food coloring or natural food coloring are perfect for coloring dough: fruit and vegetable juices (beetroot, carrot juice, parsley juice), cocoa, coffee. Dough of different colors is stored in separate plastic bags or jars. Just like paints, pieces of colored dough can be safely mixed to obtain the desired shade:

While the dough is cooling and reaches the desired condition, you can prepare your work space and everything you need for modeling. First of all, we clear the table of foreign objects and cover it with oilcloth. We may also need:

Almost everything is used for dough modeling: buttons and fabrics for textured prints, various seeds and cereals for original ornaments, dried flowers, fresh embossed leaves, twigs, etc. Wet fabrics and objects slightly vegetable oil before printing so that they do not stick to the dough. Beautiful buttons, pebbles, glass, bugles, beads, shreds and lace, threads and chains can not only be printed, but also “stamped” directly into the dough. If you fire your products in the oven, make sure that the beads are not plastic, but glass, and the threads are not made of synthetics.
Since the dough dries very quickly in air, it must be kept in tightly closed jars on the workbench. Each time you need to take exactly as much dough as necessary, and immediately fold the excess back.

You can work with the dough in several ways. Firstly, you can roll out a layer of dough, cut out various flat figures from it, and then make a composition out of them. However, to make a three-dimensional product, it is better to sculpt individual parts and then combine them into the intended composition. We wet the joints with a brush and gently press with a finger. A toothpick will help attach the head to the body.
To create a picture or sign based on a board, first roll out the dough one to one and a half centimeters thick, cut out the desired shape from it, let it dry for several days and only after that apply the rest of the details, using the same salted dough, diluted to a mushy consistency, as glue condition. Fresh parts are held together with a brush and water.

To make a nice frame, you can first draw a sketch on cardboard, then cut it out and cover it with dough, and when it dries a little, attach small details.
When working with three-dimensional vertical figures, you should use a wire frame. Inside large volumetric products you can put tightly formed balls of foil for baking, boxes or jars, carefully covered with dough so that there are no holes or cracks. In this case, less material will be required to make the product; it will not deform during drying and will dry much faster.
If you have any unused dough left after work, wrap it in oilcloth or a plastic bag and put it in the refrigerator. This will prevent the dough from drying out and spoiling for several months.

In order for dough products to gain strength, they need to be air dried or fired in the oven. The first option will take quite a long time, since during air drying the moisture from the product evaporates very slowly. In good weather, the product will dry only a few millimeters in one day. It is better not to place dough crafts on the battery, because there is a high probability that they will simply crack.
It is better to use a combined method - first dry the product a little in the sun and then burn it in the oven. You cannot bake the product! It should not be baked, but dried at the lowest temperature, with the oven door slightly open. In this mode, the product should be fired for one and a half to two hours, until it turns brown and the dough hardens. If overheated, bubbles and cracks will appear on the figure.
After drying or firing, salt dough products can be painted and varnished. For coloring, you can use acrylic paints, but artistic gouache with the addition of a small amount of PVA glue is best. After drying, this mixture will give the product a slight shine and will not stick to your hands. Acrylic varnish is perfect for varnishing; it is non-toxic, water-soluble and dries in only 6-8 hours.
to contents