Today we’ll talk about an incredibly tasty and easy-to-prepare dish. The Armenian gata is known to Russian people from the famous Soviet comedy “Prisoner of the Caucasus”. This is the dish that the heroine of the film ate. But the peoples of Transcaucasia have been preparing gata for many centuries. Even in medieval chronicles there are the first mentions of this dish.
Several hundred years ago, gata was served only on major occasions and was considered exclusively festive dish. In those days, savory flatbreads were baked only in the tandoor. Today, modern housewives who master the gata recipe use gas or electric stoves. Although in some families traditional gata is still cooked only in a real oven.
History has preserved several legends that relate to this dish. The first says that when cooking, the housewife always put a coin inside the cake. Whoever received it could count on good luck and rich, satisfying days. The second talks about the method of serving the dish. A tray was placed on the back of the youngest member of the family, on which there was one whole flatbread. The young man bent down as low as possible, and the elder cut the sweet into portioned pieces.
It should be noted that each region has its own own recipe ghats. For example, an Arhatsk or Kirovakan housewife will prepare the dough only on sponge. And in Yerevan, unpaired dough is used. The filling also differs depending on the region. Yerevan housewives will certainly fry the filling and then cut it with a special figured knife. And in Gyumri they will also add granulated sugar.
According to the traditional recipe, gata is prepared without a lot of sugar. The dough can be yeast and sour cream, without yeast and puff pastry. Even gata dough is made on the basis of matsoni.

Baking is prepared in two versions. In the first case, it will be a large flat cake, the diameter of which is about twenty centimeters. In the second - a roll, cut into portions. As for flour, there is a huge choice for housewives. The recipe allows the use of corn and wheat flour, with or without the addition of starch. Pohindze is also sometimes used - the base of this baking composition is shredded and toasted wheat.
As for the internal composition, the traditional Armenian gata has a filling called khoriz. This is fried flour mixed with melted butter, flavored with chopped nuts or sugar. Some housewives use raisins, almonds or sesame seeds as filling. The gata recipe does not allow a lot of sweet ingredients. This needs to be remembered.
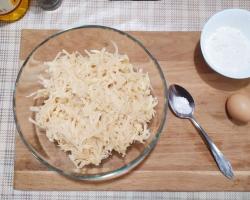
Product List:
For cooking traditional filling For a rich Armenian gata, you should take one glass of sugar and flour, as well as a piece of butter weighing 150-170 g.

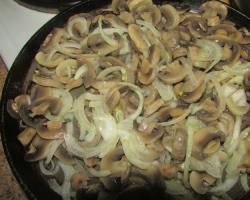
Experienced Caucasian housewives advise starting the dough preparation process with the filling. Khoriz is done very simply and quickly. Pour flour into a small but deep container. We forget to sift it first. Let's make a well. Pour melted milk into it in a gentle stream butter.
Next comes a spoon or hands. Grind the flour and butter thoroughly so that there are no large, untidy lumps. To make the filling more crumbly, you can add a little flour to the wet butter mass. Since we won’t put sugar in the dough, we make the filling sweeter. At the last stage of kneading, add granulated sugar or honey
After cooking, the horiz is poured into a small container with a lid and placed in the refrigerator. Note that such sweet filling for gata, it can be refrigerated for up to several weeks. One time we made more, another time we didn’t waste time, we used ready-made filling.

Before you start preparing the dough, divide the flour into three parts. Pour two of them into a container and add cold butter there. There is no need to melt it, just break it or cut it into small pieces with a knife. If you don’t have butter in the house, you can always replace it with good margarine. It is important that it is unsalted and has a high percentage of fat.
Now let's move on to the most interesting part. If a Russian housewife uses her hands or a spoon to knead the dough, then an Armenian housewife wields a large knife. We begin to literally chop the dough, mixing it with butter. As a result, you should get fairly large pieces, the size of which is no smaller than a grain of buckwheat.
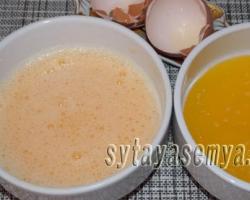
We form a small mound from the chopped dough and make a depression in the very center. Break the eggs there. During this process, reserve the yolk of one egg. This will be used a little later to brush the gata cookies.
Let's take our time. Gently stir the egg mixture right in the center using a fork. Now pour matsoni into the well and add soda. The reaction will not take long to arrive. In a matter of seconds, a white volcano will erupt over a mountain made of dough. After the riot of soda and matsoni subsides, add sugar (optional), salt, vanillin and baking powder. Picking up the dough with a knife with the edge in the center, mix.
To ensure a soft and pliable dough, you can vary the amount of flour during the process.
The listed ingredients make a fairly large amount of dough. If you do not plan to bake a large number of gata cookies right away, you can put two-thirds or one-third of the dough in the freezer. It will be perfectly stored there until the moment when your household members again want to taste Armenian sweets.
If you plan to bake for tomorrow, you can simply put a piece of dough into a plastic bag and put it on the bottom shelf of the refrigerator. This is what makes the gata recipe so wonderful: the filling and dough can be made in large quantities in advance, and used when needed.

Divide the piece of dough left for work into two parts. Each portion should be rolled out into a sheet, the thickness of which will be no more than two millimeters. There is no need to sprinkle flour on the rolled out piece; the dough for gata is already quite greasy and will not stick to the table.
Pour a few tablespoons of filling into the center. We level it so that about five millimeters of clean dough remains from the edges. The loose edges will help shape the baked goods better later. Once the filling is distributed, we begin to roll the roll. It should be quite dense.
Brush the top of the roll with the yolk we left earlier. You can prick it with a fork in some places so that the dish bakes faster. You can bake gata in this form, but experienced housewives advise cutting it immediately into portioned pieces. This will significantly reduce the cooking time and make the sweetness crispier.
The oven should now be ready for use. It should be heated to 200 degrees. We note the time on the clock. It will take 20-25 minutes to prepare puff gata.

We have already said that the dough and filling for gata are perfectly stored in the refrigerator for a long time. It turns out that the sweet itself can easily be frozen and prepared for future use. It is heated in the oven or in the microwave.
Gata that has just been cooked but not completely eaten will be stored wonderfully in a regular bread box or under a towel for three to five days. The dish is served with kefir, milk, matsoni or fragrant aromatic tea.

Bon appetit!
Calories: Not specified
Cooking time: Not specified
The Armenian gata turns out to be very tasty and unusual. Recipe for puff pastry with unusual filling. Few people will guess what ingredients are included in its composition. Armenian gata is prepared easily and quickly, even a teenager can handle it. This is quite budget baking, which does not require large expenses. Products for it are always available in the kitchen of every housewife. And also see how to cook.
Required Products:
For the test
- butter – 150 g,
- wheat flour – 250 g (plus a little more),
- natural yogurt – 100 ml,
- baking powder – ½ teaspoon,
- salt - a pinch.
For the filling
Sugar – 200 g,
- wheat flour – 200 g,
- butter – 80 g,
- vanilla sugar – 10g,
- yolk for lubrication.
How to cook with photos step by step
1. In a bowl, combine sifted wheat flour, baking powder, salt and butter (preferably cold). Chop the mixture with a knife or grind it into crumbs. Tip: You can use margarine instead of butter. 
2. Add natural yogurt to the resulting crumbs. Tip: Matsun (matsoni) is traditionally used, but it can be replaced with natural yogurt or kefir. 
3. Knead elastic, moderately soft dough. If the dough sticks too much to your hands, you can add a small amount of flour. Roll the resulting dough into a ball and wrap in cling film. Place in the refrigerator for 40-50 minutes. Tip: the dough for gata does not need to be kneaded for a long time so that the butter does not start to melt from the warmth of your hands. As a result, more flour will be needed - and this will change the structure of the dough not for the better. 
4. Meanwhile, prepare the gata filling. In a bowl, combine sugar, flour, butter and vanilla sugar. Thoroughly grind all ingredients into crumbs. Tip: you should use only butter for the filling; do not replace it with margarine. The taste of the filling will depend on this, and it should be aromatic with creamy “notes”. 
5. Divide the chilled dough into two parts and roll one of them into a thin layer. 
6. Distribute some of the filling over the entire surface of the layer and compact it a little. 
7. Roll the stuffed layer into a tight roll. 
8. Using a soft brush, brush the surface of the roll egg yolk.
9. Cut the roll into diamonds 4-6 cm wide. To make the cut look much more beautiful and appetizing, use a figured knife (ribbed). Do the same with the rest of the dough. 
10. Cover a baking sheet with parchment. Transfer the preparations to a baking sheet. Use a fork to make a “lattice” - this is a traditional pattern for the Armenian gata. Place the baking sheet in the preheated oven. Bake the puff Armenian gata at a temperature of 2000C for 10 minutes, then reduce the heat and continue baking it until ready at a temperature of 1800C for 20 minutes. The gata should be nicely browned. Remove from pan and cool. 
11. Armenian puff pastry gata is ready. You can invite your family for a cup of aromatic tea. 
Bon appetit!
Also try cooking
This is the set of products needed to prepare Yerevan gata dough. You can take ready-made ghee or prepare it yourself at home. The water temperature for the test should be 30 degrees.
Let's prepare straight yeast dough. To do this, pour warm water into a deep bowl and dilute fresh yeast in it. Sift the flour mixed with salt here and begin kneading the dough. Kneading the dough for Gata is quite difficult, the dough is steep at first. As soon as the flour has taken all the water, we begin to gradually add ghee.

It took me about 10 minutes to knead the dough, and each time I added a new portion of ghee, the dough became softer. Rounding up ready dough, cover and leave warm for 30 minutes. While the dough is resting, prepare the next portion of ghee (100 grams) for layering the dough...

And let's make the filling. For the filling, mix flour and melted butter.

Rub the flour and butter with your fingers until you get crumbly crumbs.

Add powdered sugar to the resulting crumbs, mix the crumbs with your hands again. The filling is ready. Let's put it aside.

Let's start layering the dough with melted butter. The book gives the exact weight of flour that may be needed when rolling out and laminating the dough, but the dough is not sticky at all, so I barely needed any flour. For convenience, I divided the dough into 2 parts and rolled each one separately.

Roll out the dough into a layer 2 mm thick, use a pastry brush to coat the surface of the dough with melted butter, fold the dough in half, wrapping the butter inside, and roll out again. In this way, we repeat the procedure 4-5 times, or until the ghee runs out. I got 7 layers.

As with kneading dough, it is very difficult to roll out at first, but with each layer of butter added, the dough becomes softer and softer. The result puff pastry roll into a tight roll.

Cut the roll into pieces weighing 200 grams each. From this amount of dough we get 5 pieces of dough. We measure out the filling: 170 grams for each product.
The traditional form of Yerevan gata is a round flatbread with filling inside. In this form, gata is served in Armenia for holidays and weddings. To make a traditional gata shape, roll out a piece of dough into a thin round cake. Place the filling in the center of the flatbread, leaving the edges free.

Next, gather the edges towards the center and carefully pinch. Lightly roll the dough with a rolling pin (or gently knead it with your hands) into a round cake 2 cm thick. There is no need to press down the filling too much; it should remain crumbly.

Place the gata, seam side down, on a baking sheet lined with baking paper. We prick the top of the Yerevan gata with a fork in several places. You can apply patterns over the entire surface of the dough (with a fork or the blunt side of a knife). Brush the surface of the gata with egg yolk and bake in a preheated oven (at a temperature of 190-200 degrees) for 20-25 minutes or until done.

From one piece of dough I formed gata, familiar to our eyes, in the form of individual cookies. With this forming, the filling does not spill out during baking and the butter does not melt at all, but there are some difficulties when forming the gata before baking - a small part of the filling spills out when transferring the pieces to a baking sheet.

A friend from Armenia told me that it is correct to call this pastry “Kyata Yerevanskaya”. So, crumbly and tasty Kyata Yerevan is ready! Despite the fact that there is no sweetness in the dough, the baked goods turned out sweet due to the filling and very aromatic, although there are no flavors in the composition. Bon appetit!
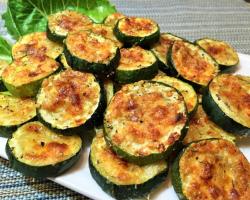
Armenian cuisine is very rich in a variety of dishes of amazing taste, the preparation of which does not take much time, but gives a delicious result. One such dish is gata, a delicious sour cream cookie. Slightly crispy, crumbly, with a delicate creamy taste and aroma.
Thanks to the large amount of butter (or margarine) in the dough, Armenian gata does not dry out for a long time, remains tender, fresh and tasty. Cookies are quite high in calories, so those who are watching their extra pounds should enjoy baking with caution. But, nevertheless, gata is worth trying.
TAKE CARE OF YOURSELF!
For the filling (horiz)
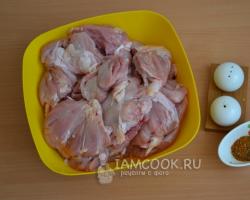
Sift the wheat flour onto a work surface. Next, mix it well with butter or margarine with your hands, as a result of which crumbs should form, as when chopping.
Make a hole in the resulting mass. Separately break the eggs, separate the whites from the yolks. We immediately place the yolks into the recess of the “well”.

We also send sour cream there. To prepare gata, you can use sour cream of any fat content.

From the prepared ingredients you need to knead a soft dough that does not stick to your hands.

Divide the prepared dough into approximately equal 3 parts.

For the khoriza (filling), mix soft butter with sugar and flour. Take enough flour to make a crumbly mass (but don’t overdo it).


Now pour the horiz (filling) onto the rolled out layer of dough. Distribute it evenly over the entire surface.

Divide the layer roughly into six long strips. Fold the dough in half: the first part to the second and the sixth to the fifth.

Fold the resulting pockets again towards the middle. You should now have two connected stripes.

Fold the two strips together.

Cut the resulting strip with a curly knife slightly diagonally into smaller pieces. Be sure to pierce each one in several places with a fork.

Now carefully place the pieces on a clean and dry baking sheet, brush them with egg and place in the oven, preheated to 180°C. Bake until golden brown (about 20 minutes).

Armenian gata is ready! Such wonderful cookies are perfect for tea, coffee, and a glass of milk, both cold and hot. Bon appetit!

Recipe No. 2
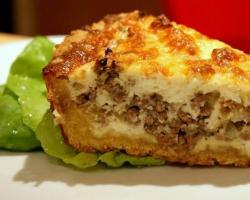
Artsakh gata is a round flatbread with khoriz, a special filling made of butter and flour. Its recipe has been known for several centuries and has hardly changed. Except that today Artsakh gata is prepared not in a tonir (tandoor), but in the oven. In the classic version, the Armenian flatbread contains a large amount of melted butter in the filling, so sweet dessert It turns out very satisfying and high in calories. Artsakh gata is served with matsoni or tea made from mountain herbs. This is exactly the kind of flatbread that the heroine of “Caucasian Captive” Nina eats with pleasure.

Khoriz for Artsakh gata can be prepared in advance and the filling can be stored in a closed container in the refrigerator for several weeks. It is added to all types of gata, as a filling or used for sprinkling on sweet pastries. Horiz is similar to German streusel.
To prepare, you need to take butter or ghee and sugar in equal proportions, and then grind them with two portions of flour. To prevent the fat from melting, you need to mix the horiz in a cold container and quite quickly. For three Artsakh gata flatbreads, which are made from the specified amount of ingredients, you will need 450-500 g of filling. This means that you need to mix 120 g of butter and sugar with 240 g of flour.

In a separate container, mix warm water, yeast, 1 spoon of sugar and 1 cup of sifted flour. This dough should be left for 2 hours in a warm place. It should foam and become covered with bubbles.

After this, grind the ghee in a separate bowl, leaving 20 g for greasing the flatbreads. After 5-7 minutes it will become a little lighter and acquire a smooth, velvety consistency.

Then add salt, vanillin, sugar, two whites and one yolk to the oil. The second yolk should be set aside to grease the gata before baking.

The oil must be mixed with the new ingredients until smooth. Then you should pour in the dough.

The resulting mixture must be stirred for 3-4 minutes, and then gradually add the sifted flour to it.

You should get an elastic, pliable dough. It should be covered with a towel and left warm for 30 minutes.

After this, the dough must be divided into portions of 250 g.

Each of them needs to be rolled out into a round cake with a diameter of 15-17 cm. To prevent the dough from sticking, the table can be lightly dusted with flour.

Brush one side of the flatbread with softened melted butter.

You need to pour choriz on top. Each gata will require about 150 g of filling.

The edges of the dough must be gathered into a bag and pressed tightly.

Then it should be turned seam side down and rolled out to a thickness of 1.5 cm.

The surface of the Artsakh gata is usually decorated with some geometric pattern. For example, you can use a fork to draw several intersecting paths. Then the flatbread should be greased with egg yolk, the lines should be drawn again and several punctures should be made with a fork so that the gata does not swell.

Armenian flatbread with filling is baked at 180 degrees for 30-35 minutes.

Gayane told how to prepare gata, recipe and photo of the author.

I’ve had a recipe for Gata cookies in my bookmarks for two or three years now, and for some reason I still couldn’t get around to baking them. And recently, site reader Yana reminded me of its existence, and I decided: here it is, a reason to finally bake gata, which had long intrigued me with the simplicity of the recipe and the beauty of the cookies: rosy, with curly edges, they beckoned me to try. You and I have already prepared similar cookies once - cottage cheese rolls. Although they are similar in shape, they are different in taste.

I found gata on the website of my friend Marie from Batumi http://receptimari.com/vipechka/pechenye-pechenie/pechene-gata-retsept.html ; she is a specialist in Caucasian cuisine and a talented cook, so I chose her option. Although, I think there are many versions of preparation, as well as names.

This simple delicacy is very popular in Georgia, Armenia, Azerbaijan, and in different regions it is called differently, although it is similar: gata, kada, kata, kyata. This name is very similar to the French “gateau” - “cake”, although philological researchers claim that this similarity is accidental. Cookies are a national dessert in Armenia: along with baklava, they are always prepared for weddings. And on New Year- then a coin is placed in the khata - to prosperity and success. Kata even appeared in the film “Prisoner of the Caucasus”!
Not only in different countries, but even in different regions of the country, katu is prepared differently. There is Artsakh, Yerevan, Baku... Moreover, the dough can be different: yeast (which is typical for the Armenian gata), puff or shortbread (as in our recipe), but the composition of the filling is always the same and is a sweet crumb made of flour, butter (or nuts) and sugar. Large quantities sugar in the filling compensates for its absence in the dough, and together it turns out very tasty: crumbly cookies with a crispy crust and soft filling. Freshly baked, warm kata is more tender and softer than cooled one - but the cookies are delicious in any form. It can be stored for two, three days or longer (we didn’t test it because the goodies were eaten). It is better to store it covered with a towel or even sealed tightly, because after standing, the dough becomes drier and crispier. Although, it depends on what taste you like!
From this quantity of products you get a whole baking sheet of gata - a lot; The four of us ate for three days.

For the test:
For the filling:
According to Marie's advice, you can replace the butter in the filling with chopped nuts. I think you can experiment with walnuts, almonds, hazelnuts, hazel...
For lubrication:
Both the dough and the gata filling are extremely easy to prepare.
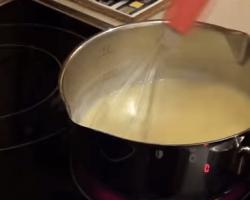
Melt the butter for the dough, let it cool to a lukewarm state or room temperature.

Pour soda into the sour cream, stir and leave for a couple of minutes. Soon you will see how the sour cream begins to come out of the container like a foamy “cap”. This soda reacted with fermented milk product, which will ensure the dough is soft and crumbly, coupled with fat, which will add a “sandy” effect.

Sift the flour into a large bowl - not all at once, but 3 cups out of three and a half; put sour cream there, mix.

Pour in the melted butter and knead the soft dough, adding the rest of the flour (if necessary). For the dough I needed just 3.5 cups (200 grams), but in each case the amount will depend on the flour.

The dough is very pleasant: soft, but not sticky, because it is quite fatty. Kneading it is a pleasure, but this is not yeast dough, which needs to be kneaded longer - but shortbread dough, which, on the contrary, needs to be kneaded as quickly as possible. Therefore, having collected all the components of the dough into a bun, divide it into 4 parts, wrap it in cling film and put it in the refrigerator for 30 minutes.

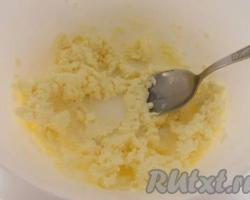
In the meantime, you can make the filling for the gata. In a separate bowl, mix sifted flour, sugar and soft butter.

Beat with a mixer or simply stir with a fork until smooth, fluffy, tender crumbs.

Prepare a baking sheet by lining it with high-quality parchment. You don’t even have to grease it (but only if the parchment is good! – the cookies won’t stick). And if the paper is so-so, then it makes sense to apply a little thin layer vegetable oil. But don’t overdo it, the dough itself is quite fatty.
Sprinkle the table with flour. Roll each part of the dough in turn into a rectangle approximately 26x20 cm, 3-5 mm thick. Visually divide the filling into 4 parts.

Pour a quarter of the filling onto the dough layer and distribute evenly, almost reaching the edges - 2-3 cm each.

Roll the roll along the long side, pinch the edges and seam.

Place the rolls on a baking sheet, seam side down, at a distance of 3-4 cm from each other.

Brush the rolls with beaten egg or yolk mixed with a teaspoon of milk.

And we cut it - in the classic version, with a curly knife, so that the edges of the cookies turn out wavy. But my knife couldn’t cut through the thick layer, so I cut it with a regular knife. But not across, but slightly obliquely. Well, do it as you like.

Bake the gata for about half an hour in an oven preheated to 180C until the dough in the middle is baked and the crust becomes golden brown and shiny. Again, the baking time and mode will be individual for each oven: Marie’s indicated 25 minutes at 160C; After this time, my cookies were still damp inside, so I kept them for 35 minutes at 180-200C. It depends not only on the oven, but also on the quality and calorific value of the gas... or maybe you have an electric oven? The method of heating is also important (top-bottom or just bottom), and so on...

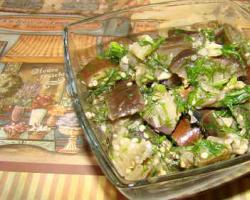
So we determine the readiness of the kata by appearance cookies - just don’t overdry them, as the cookies dry out quickly. Transfer the finished gata to a tray and let it cool a little...

And let's treat ourselves!