The growing popularity of homemade fermented milk treats makes any yogurt recipe a real find. Here are some popular recommendations and original recipes that will allow you to prepare this tasty and nutritious product.
The set of ingredients for homemade yogurt can be extensive and consist of many items. As additives to the main elements you can use:
But the basis is always the starter and the milk used for mixing with it. Both ingredients are widely available on the market, but the relative quality of the first can only be guaranteed by purchase at a pharmacy, or at least in a store healthy eating. Popular versions of this ingredient are:
It is easier to purchase milk for mixing with starter culture at any available retail outlet. It is important that this is not milk drink, and before mixing it must be boiled.
In the process of searching for suitable elements, it is worth listening to some recommendations from experienced housewives, for example:
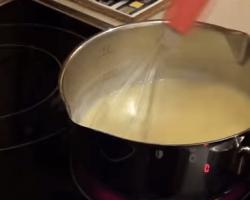
To make such a starter, 130 grams of milk is enough. If the product is from a cow, it must be boiled, then cooled to body temperature, removing the foam from the surface. It is enough to heat the store-bought analogue to the same temperature. Add to the milk prepared in this way:
The components are thoroughly mixed, the finished mixture is left alone for 24 hours, ensuring temperature regime no more than 40°C. For this purpose, place the container with the mixture in any warm place, wrapped in a towel, or placed in a yogurt maker.

Classic yogurt eliminates the addition of sugar and its analogues during the preparation process. Various sweeteners, for example, jam or fruit syrup, finely chopped fresh fruit are added later, when the mass has cooled and is ready for use. You need to prepare such yogurt exclusively from two elements:
IN step by step version The cooking process is as follows:
You can serve it pure or with natural additives from fruits, freshly squeezed juices, and other additional ingredients.

Fermented milk products homemade often recommended for children from an early age, usually from ten months. This will minimize your baby’s consumption of harmful food additives, which are still present in commercial baby food, albeit in small doses. For mothers familiar with in the classic way, preparing a fermented milk treat for kids is not difficult. However, in this case you will need to take into account several important nuances:
In this case, there is no need to describe the detailed cooking method; the procedure differs little from the classic version, taking into account the listed features. The milk component is brought to the desired temperature, mixed with the starter, then mixed with one of the types of purees. Cooking time is at least 5 hours.

In this case, instead of the standard fermenting component, it is proposed drinking Activia from Danone in the amount of 5 tbsp. spoons The only condition is to make sure that this ingredient is extremely fresh. You can add nuts or bran of any kind to the two main components. The cooking process is identical to that described above:
The longer the time, the thicker the consistency will be at the end. But you need to be careful, overdoing it over time can result in excessive acidity and loss of taste. After the device has finished operating, we move all the containers into the refrigerator and keep them there for up to 4 hours.

This recipe is almost similar to the previous one; Activia is also recommended as a fermenting agent. But an additional element in the composition is jam, which can be supplemented with nuts. Contains:
We prepare according to the well-known scheme:
After cooking, allow time to cool in any cold place. It is advisable to mix the complex composition before use.

This type of fermented milk treat is important element of the popular Greek appetizer sauce Dzadzyki. You can use it to make a topping for a cake or use it for the same purpose with ice cream. True, the latter is not an acquired taste. Naturally, it is useful in itself. The recipe contains:
Below is step by step recipe preparing Greek delicacies.
After familiarizing yourself with the rules for choosing products and instructions for making homemade yogurt, it will not be difficult for you to pamper your family and guests healthy dessert. Original recipes This fermented milk delicacy will appeal not only to children, but also to adults. And if the treat starts to taste ordinary, you can always diversify it with a variety of delicious toppings.
Yogurt is very tasty, dietary and everyone loves it, especially if you prepare it at home, without any preservatives, dyes or additives)) The correct preparation of yogurt depends not only on the heating of the milk, but also on the exposure time. Today we will look at making homemade yogurt in a yogurt maker, and in the following articles we will look at how to do without it))
 Homemade yogurt – thick enough for a spoonful))
 Yogurt turns out to be especially thick and tasty if you take milk with a fat content of 3% or higher, and even better if you add a couple of tablespoons of sour cream during the cooking process - you are guaranteed thick, natural yogurt! Well, now let's look at all the details in more detail...
Narine is an excellent bacterial starter that is not only a prebiotic, but also contains lactobacilli acidophilus, which helps strengthen the immune system. You can also use analogs of Narine to make homemade yogurt - for example, Evitalia, Yogulact. All of these sourdough options can be purchased at your city pharmacy.
| I took Narine in ampoules, but it is also sold in bags of powder. As a rule, a bag contains 150 ml of milk. If you took it in ampoules, then 2 ampoules per liter are enough. The milk must be pasteurized and heated to 40 degrees. Add a little milk to the ampoules and mix. |
|
| Pour both ampoules with the starter into warm milk. |
|
| Add sour cream to the milk - you can skip this step, but it definitely tastes better with sour cream! Stir until the sour cream dissolves. |
|
| We wash the jars from the yogurt maker well and pour boiling water over them - the most important thing in preparing yogurt is sterility. Pour the starter into jars, cover the yogurt maker with a lid and start the process for 12 hours. |
|
| The lid “fogs up” a little, because the whole principle of operation of a yogurt maker is to maintain the optimal temperature for fermenting the product for all these 12 hours. At this time, you cannot open the lid, and you cannot disturb or rearrange the yogurt maker either. Let it work)) |
|
| Place the jars in the refrigerator (cover with lids) for a couple of hours. This is what we get in the end - the sourdough may turn out to be viscous, or maybe thick - this is not important, the main thing is to get used to your unit)) And what is most important - now you not only know how to prepare the sourdough, but you can also safely eat it, because what a very tasty product it turns out)) The starter can be stored for a week in the refrigerator. |
|
| Well, to do homemade yogurt You can also heat the milk and add the starter - 2 tablespoons per 1 liter of milk. Mix, pour into glasses and place in a yogurt maker for 8 hours. Be sure to cool the finished yogurt for 2-3 hours and eat with berries, jam, oatmeal or just like that)) And also or make dietary desserts, ) Bon appetit! Tasty and healthy! |
|
| You can make the starter in a smaller volume if you just want to get yogurt, but more often the starter turns out so tasty and thick that there are just a couple of spoons left to put the milk on the yogurt)) So, as they say, think for yourself, see for yourself))) And I promise a series of recipes about baking with yogurt, desserts and various health benefits, because it’s hard to imagine a more healthy and dietary product than homemade yogurt)) Bon appetit! |  |
 Yogurt panna cotta with cherry sauce
 Fluffy milk pancakes
 Homemade ice cream sundae
 Light dessert with natural yogurt
 Simple cottage cheese pancakes in a frying pan
It's no secret that yogurt is a very healthy product for both adults and children. It perfectly regulates digestion, strengthens the immune system, it also dietary product, rich in calcium, perfectly removes toxins and waste from the body. But, unfortunately, among the abundance of all kinds of yoghurts in our stores, for some reason it is impossible to find a truly natural product, and even without all kinds of chemical additives, pure flavors, and taste enhancers. It is better to prepare homemade natural yogurt, so you will be sure of its freshness, its ingredients and invaluable benefits.
It turns out that making yogurt at home is not such an impossible task. For this we need either a thermos, a multicooker, or a yogurt maker. We will talk about making yogurt in a yogurt maker. At home, we will prepare fruit yogurt with banana; instead of banana, you can use any other soft fruit, for example, strawberries, raspberries, kiwi, peach.
Taste Info Dairy desserts
To prepare yogurt in a yogurt maker with banana, it will take 8 hours, the amount is 1 liter.
To prepare yogurt, it is very important to maintain temperature conditions. Pour the amount of milk we need into a saucepan (my yogurt maker holds 1 liter) and bring to a boil. Cover with a lid and leave to cool to a temperature of 36-38 degrees. 
When the milk has cooled, we place the starter into it (the main thing is not to make a mistake with the temperature; at temperatures above 40 degrees, lactic acid bacteria die!). It could be a jar of Activia or Zhivinka, or regular dry sourdough, which is exactly what I have. 
Pour the starter into the milk and stir well. 
First sterilize the yogurt jars by steaming. This can be done using the traditional method. We put the saucepan on the stove, pour in water, put a wire rack on top, and place our jars. 5-7 minutes after the water boils will be enough. 
We remove the jars, put them in a yogurt maker, and pour milk into each. 
Cover with a lid, press the Start button, and note the time. After 8-9 hours, the yogurt will be ready. I don’t recommend keeping it for more than 9 hours, otherwise there will be whey on top and cottage cheese on the bottom (by the way, here’s a way to prepare cottage cheese, but in general it’s better to take a special starter for it, called Curd or Cheese) 
After 8 hours, remove the lid and see that the result is excellent yogurt, with a slightly runny consistency. The yellow film is sour cream, since the milk was homemade and fatty. This happens very rarely with store-bought milk, and the consistency is the same every time - evenly thick, homogeneous, but with homemade milk, yogurt turns out to be a different consistency each time. 
We talked about making yogurt in a yogurt maker using a starter. I make yogurt for my children, they don't really like to eat plain yogurt, so I add various fruits.
I peel the banana, take a large glass or bowl, and cut the banana into slices. 
I pour several jars of yogurt into a glass (I usually put one banana in three jars). 
Teaser network


You can do without a yoghurt maker at home and prepare your favorite fermented milk product in a thermos or just in a covered pan. However, I really want to simplify my life without sacrificing my health! Then it will be ideal to prepare yogurt at home in a yogurt maker according to the recipe offered below.
A yogurt maker is a completely simple electrical device: a heating container and a lid. A sort of “warm nest” for bacteria. Milk with fermentation is heated to a certain temperature at which lactobacilli begin to work, and is maintained throughout the entire fermentation process. It is suitable not only for yoghurt connoisseurs, but also for overweight people, with gastrointestinal problems, and for children of all ages.
You can make not only yogurt in a yogurt maker, the recipe is similar to other lactic acid products: sour cream, kefir, cream, cottage cheese, acidophilus milk, symbilact, bifivit, vitalact, streptosan. The final product you get depends on the starter you used and the fermentation time. All this is very tasty and incredibly healthy! By consuming homemade “sour milk” every day, you can forever get rid of the cause of hair loss, peeling skin, etc. After all, all our beauty comes from within 😉
The simplest option is to buy regular yogurt and add it to milk. However, not everyone wants to add even a very small amount of yogurt, which is loaded with dyes, starch and preservatives. Therefore, it is better to use dry starter cultures. You can purchase them in pharmacies or online stores. Usually they are packaged in small flasks with a rubber cap or bags, each of which is designed for 1 liter of milk. Very convenient.
If you were unable to buy specialized bacteria, you can purchase familiar pharmaceutical preparations such as Narine, Linex, etc. However, it is worth considering that the taste of yogurt varies depending on the starters used. For example, Narine will be more sour than usual.
To prepare yogurt, take a liter of milk (choose the fat content according to your taste, but the ideal option is 3.5%) and a portion of dry bacteria (or 100 ml of yogurt without additives).
Cover the cups of prepared yogurt with a lid and store in the refrigerator: optimally 2 days (but no more than a week).
You don’t need to buy a starter every time: for these purposes, you can use the yogurt you made for 10 cycles (we usually have enough for 5-6 times).

It is very important that all utensils involved in preparing yogurt are sterile. Therefore, all the jars, the bowl in which the starter and milk are mixed, the whisk must be doused with boiling water. This is done so that unnecessary bacteria do not get into our yogurt - otherwise we will end up with a completely different product :)
There are no particular differences in yogurt makers from different companies. The essence of all is the same - “heated thermos”. The main differences are in the design, the material of the jars (glass/plastic), the presence/absence of auto shut-off (not critical), the presence of a bowl for cottage cheese. Well, and also the size of the milk container: there are yogurt makers with one container measuring 1-1.8 liters, or with 6-8 small jars of 100-200 ml (in my opinion, this option is much more convenient). The ideal option is both cups and a bowl for cottage cheese, something like this:

By the way, you can make yogurt at home not only in a yogurt maker, but also without it: just on a battery, in a thermos, in an oven, in, even if it does not have a special mode.
In recent years, on store shelves you can find household appliances, as they say, for every sneeze. Indeed, slicers, steamers, sandwich makers, even egg boilers! It would seem that it would be so difficult - I threw the eggs into the water and after 7 minutes I took them out. However, they are also in demand 😉
But if you can think about buying an egg cooker and slicer, then such a useful household appliance as a yogurt maker is an extremely indispensable thing for healthy image life.
Ksenia Poddubnaya
The most useful product For children and adults, yogurt is considered. It is perfectly absorbed by the body, and its delicate taste makes you forget about everything in the world, especially if you add pieces of berries or fruits to homemade yogurt.
Those who follow the principles of a healthy diet are recommended to add oat, rye or buckwheat flakes to this dairy product, consuming healthy dish for breakfast. For children, you can add a sweetener to the yogurt: honey or granulated sugar so that they eat it with great pleasure for breakfast or afternoon snack.
Yogurt makes excellent baked goods, wonderful sauces and even cold soups - as you can see, the range of uses of this dairy product in cooking is quite wide.
Cuisine: French.
Cooking method: in a yogurt maker in jars.
Total cooking time: 8 h
Number of servings: 6 .

In principle, I also made good yogurt from pasteurized and ultra-pasteurized milk. In this case, take milk with a fat content of 3.2%. The higher the fat content of the milk. the thicker the yogurt will be. This milk does not need to be boiled, but only brought to a temperature of 40 degrees.
I check the temperature of the milk.
 Scald the jars and lids with boiling water, placing them in one bowl.
 For example, I wash my yogurt jars in the dishwasher and immediately put a clean lid on them after drying. in this case, the jars are immediately ready for use.
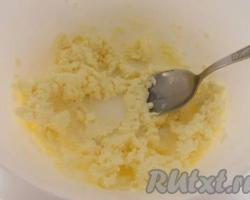
 Transfer the yogurt from the jar to a mug or small bowl. It is advisable that it be at room temperature. Pour 50 ml of warm milk into the mug and mix thoroughly with a spoon so that all the yogurt is mixed into the milk without a single lump. This stage in preparation is very important, since if you immediately pour the contents of the jar into a container with milk, the yogurt may not mix well and as a result, the product in each jar may turn out differently at the final stage of preparation.
 Pour the mug of liquid yoghurt into a container of warm milk and stir.
 Pour the resulting milk mass into jars pre-scalded with boiling water.
 Cover with scalded lids.
 Place all the jars in the yogurt maker - no need to add water to the machine! The yogurt maker will maintain an optimal heating temperature inside itself (usually 38-40 degrees), at which the yogurt will be cooked. Turn on the yogurt maker's timer for 6-8 hours.
 Don't be afraid to adjust cooking times with experience. Study the instructions for your yogurt maker and take the cooking time from there. It is also worth knowing that the time may vary for different types of sourdough. In the case of cooking using ready-made yogurt, as in this case, the time should also be reduced.
 Narine starter for making yogurt at home
 Pour the starter into the milk
 Add sour cream to milk
 Yogurt in a yogurt maker
 Homemade yogurt in a yogurt maker
 How to make yogurt starter
 Thick homemade yogurt